How To Add A Restful Api To Your Rails App
Creating a REST API with Rails
![]()
Having spent a lot of time working with JavaScript and React recently, I thought I'd revisit Rails for some practice, and wanted to write a post about creating a RESTful API using Ruby on Rails.
Rails now has the option to create an API application which is a slimmed down version of a traditional Rails web app. According to Rails 5 release notes, generating an API only application will:
- Make the ApplicationController inherit from ActionController::API instead of ActionController::Base.
- Skip generation of view files and slim-down the middleware.
For this tutorial, I'll be crea t ing an API containing a list of user submitted facts. We'll be using PostgreSQL for our database which will allow easier integration with Heroku, should be decide to host it.
This post requires that you have an understanding of Ruby / Rails and are comfortable using the command line terminal. I won't be covering the subject of password hashing or testing here for simplicity sake, but will cover these topics in more detail in a separate post.
To get started and instruct Rails to build our API, we issue the following:
$ rails new rest-api-guide --api --database=postgresql
We specify it is an API using --api and the database using --database=.
NB — if you would like to use a test-suite such as Rspec, you would need to append -T to the end of the command during setup and then install Rspec and any other necessary gems separately.
Models and Controllers
The next stage in our setup is preparing our models and controllers. As mentioned previously, we'll be keeping things simple in this tutorial, with just 2 models, User and Fact.
Models
To create the models, issue the following commands in your terminal:
$ rails generate model User username:string password:string
$ rails generate model Fact user:references fact:string likes:integer
Note that user:references creates a relationship with the User model, telling us that we'll need a foreign key called user_id. This is because we want our Fact to belong_to a User.
If we check our models, we should see the Fact model now has the association belongs_to :user set up already. We can now add a has_many :facts relationship to User and our models will be ready to migrate:

If you're using PostgreSQL for your database as I chose to, migration will be a 2 step process. Step one requires that we set up the database, before running the migration:
-
$ rails db:setup -
$ rails db:migrate
Once complete, you'll be able to check the schema.rb file in your db folder:
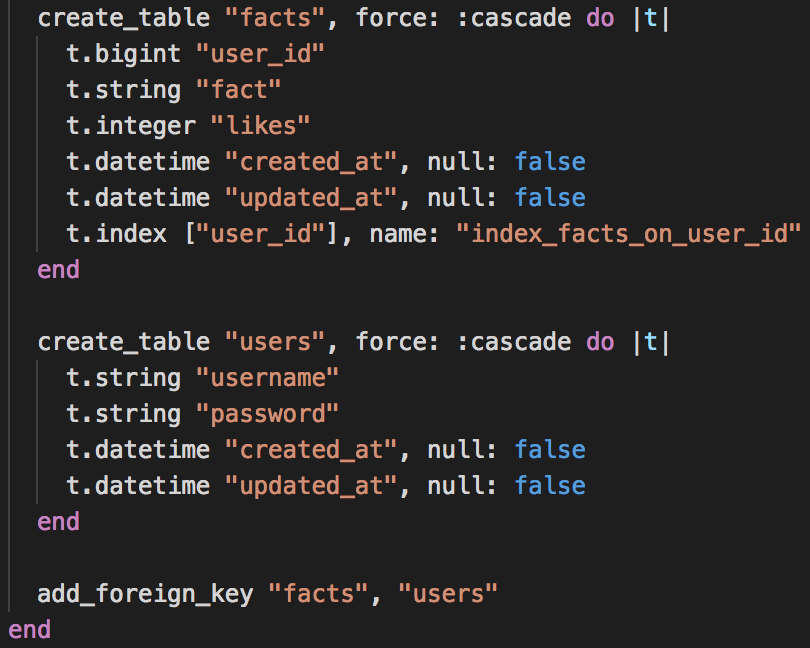
Now we can move on to our controllers, where we will make use of RESTful architecture.
Controllers
We can set up our controllers much like we did with our models, except this time we are going to create them in a sub-folder 'v1'. This is good practice for when creating future API's where you may decide to work on an updated version (v2) whilst keeping v1 live and stable:
-
$ rails g controller api/v1/Users -
$ rails g controller api/v1/Facts
Note how for models we use the singular (User) and for controllers we use plural (Users). This is an important syntactical requirement of Rails and must be adhered to for Active Record to function properly.
Once we have our controllers loaded, we'll need to establish our routes, which can be found in config/routes.rb.

Once set, you can check your routes using $ rails routes.
With this done, it's time to define our controller methods using the RESTful architecture. I began with the Users controller:
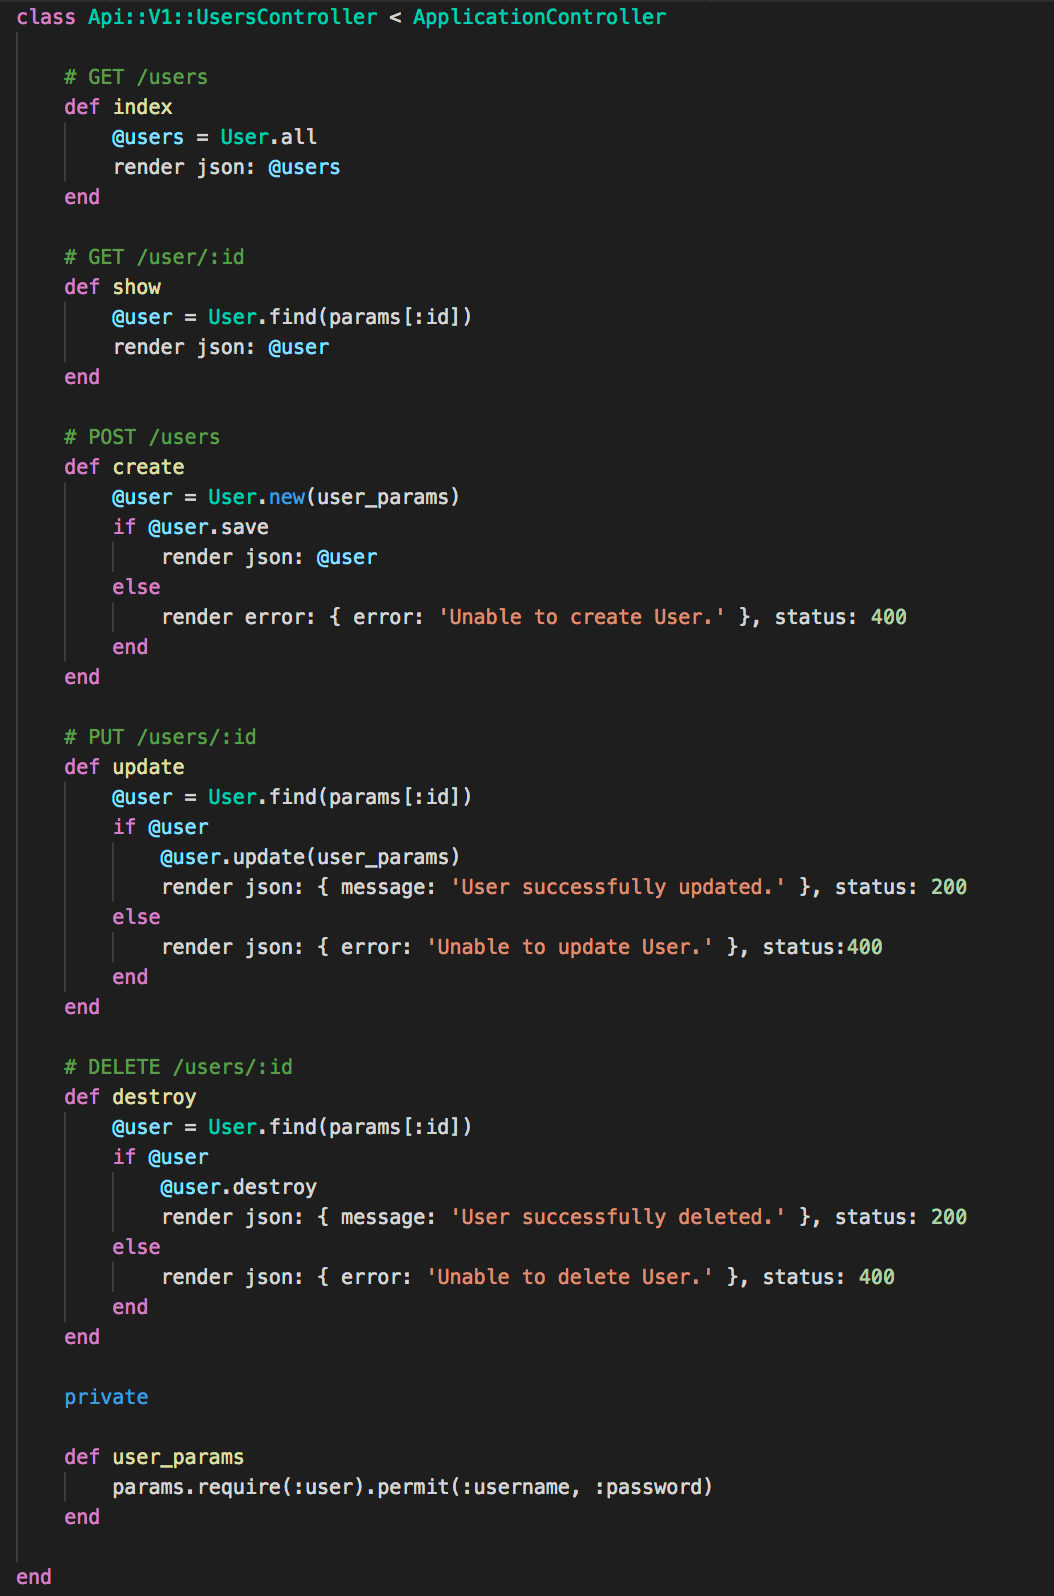
Note here that we have a private area, with the method user_params defined beneath it. This is a private class and is used for security purposes. By passing in user_params in our create and update methods, we utilise 'strong parameters' which is described as:
It provides an interface for protecting attributes from end-user assignment. This makes Action Controller parameters forbidden to be used in Active Model mass assignment until they have been explicitly enumerated.
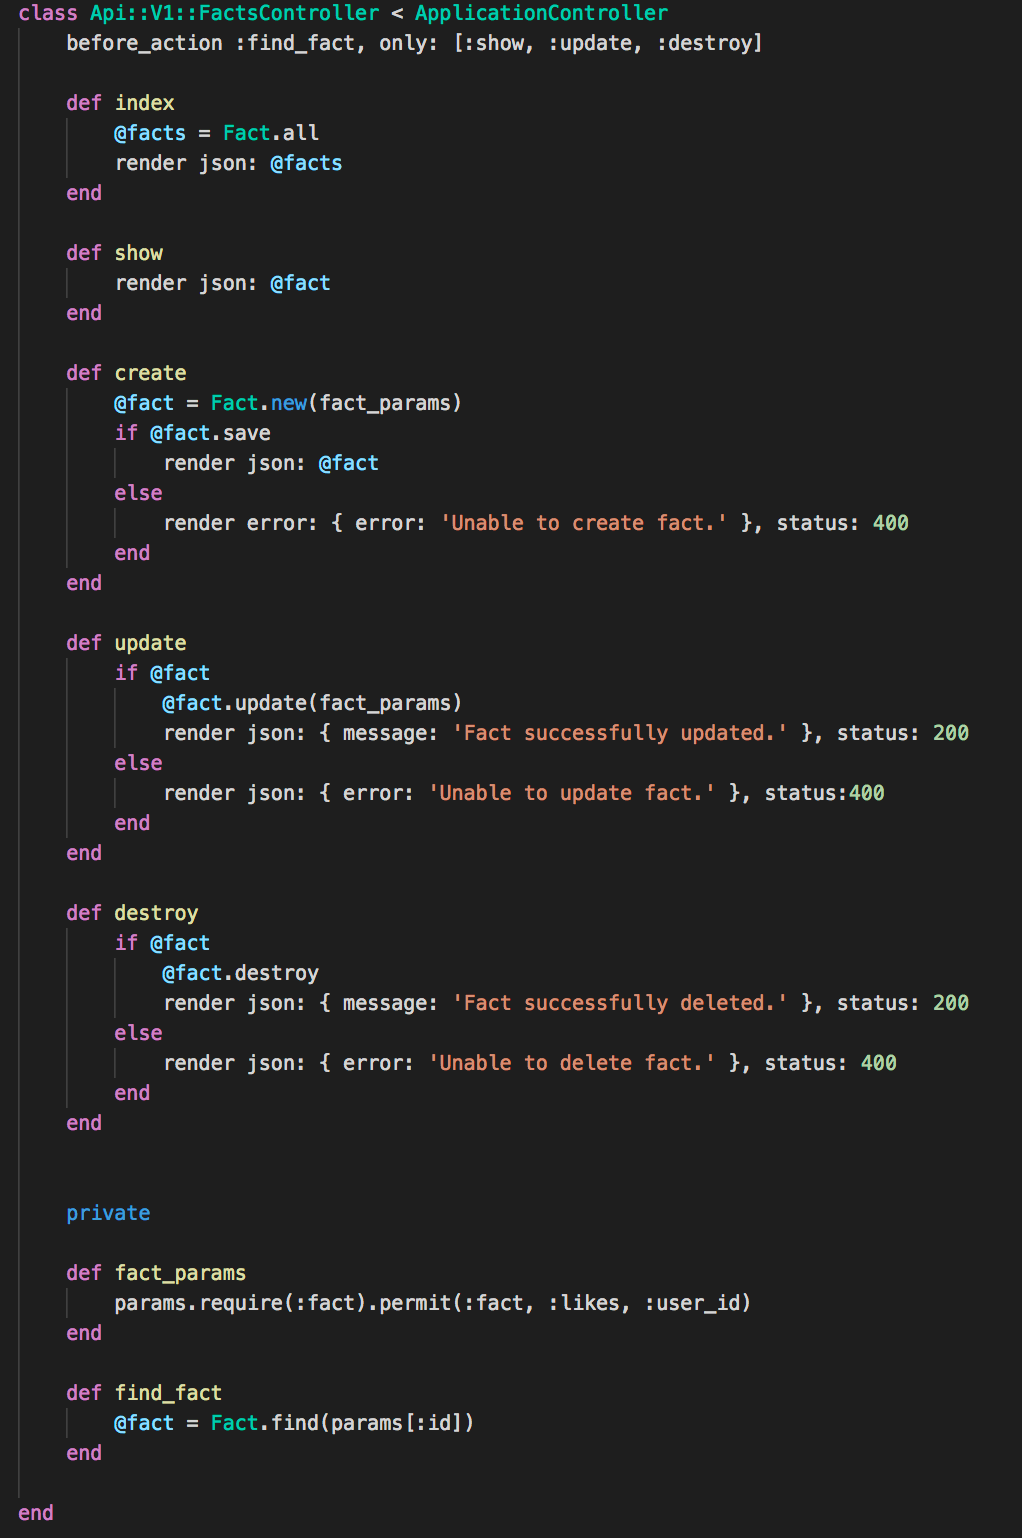
It is highly recommended you use strong params in your Rails applications for security purposes. You may also note that our code wasn't very DRY, we used .find(params[:id]) three separate times. Better practice would be to create a separate method for this and tell Rails to run this method for specific methods each time they are run.
See the Facts controller below for a comparison:
With the controllers done and our routes set up, we can run our rails server and check to see if our routes are working. Start the server using$ rails s and then head to http://localhost:3000/api/v1/users in your web browser. You should see something similar to this:

Adding Data
Great. Currently our database is empty so we won't actually return anything, so let's create a User and some Facts linked to that User.
We can either create some seed data or just use the Rails console to create our instances. I'll be using the rails console, $ rails c.
$ oliver = User.create( username: 'Oliver', password: 'password' )
$fact_one = Fact.create( fact: 'Wiley Hardeman Post was the first pilot to fly solo around the world.', likes: 1, user_id: 1 )
$ fact_two = Fact.create( fact: 'The Symphony No1 in E flat major, K.16, was written by Wolfgang Amadeus Mozart at the age of 8.' likes: 2, user_id: 1 )
Now if we check our paths:
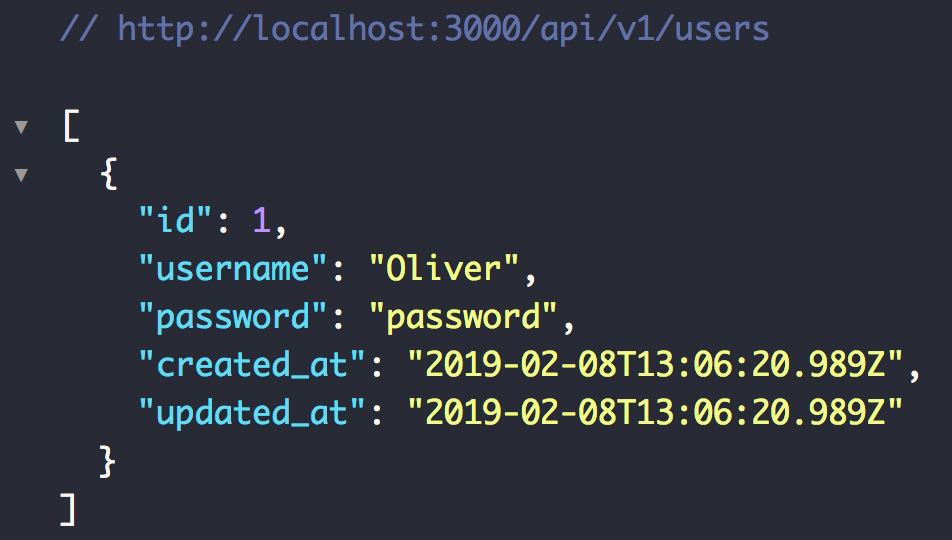
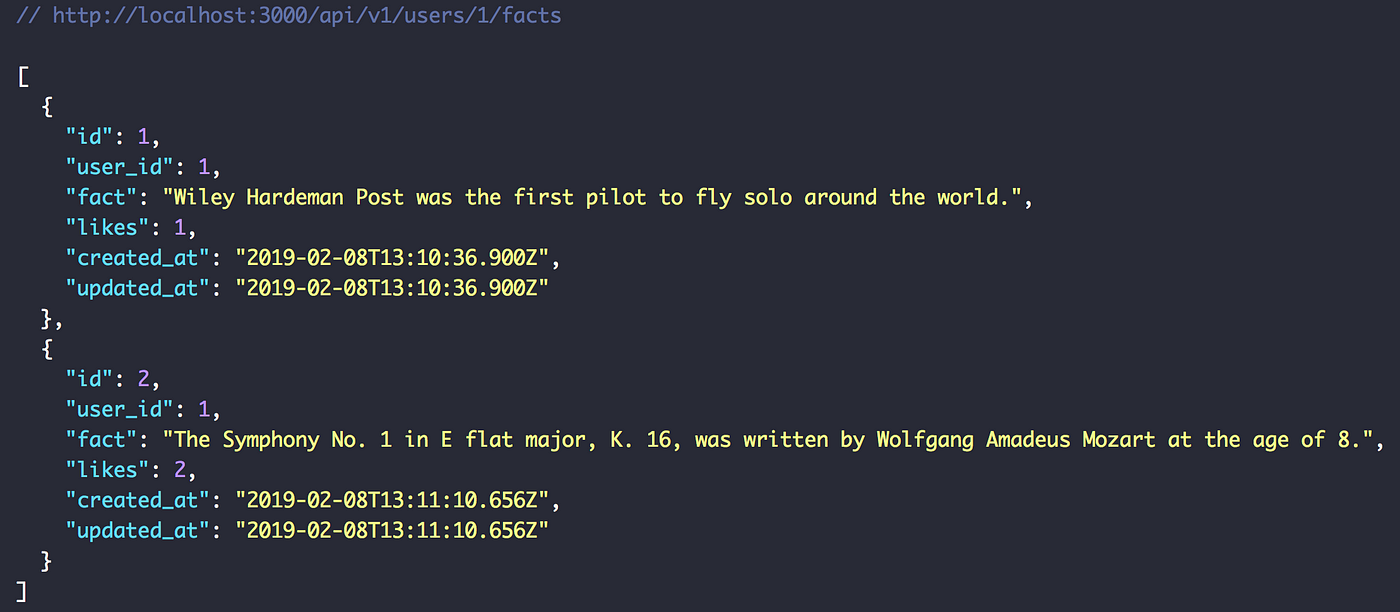
Of course, in a practical application, we will be making queries and fetch requests to our database using a variety of methods, for example using JavaScript to click on a button and sign up to a website, where the users information would be sent to our database and saved.
Hopefully for now, this has helped to form a basic understanding of how to setup a RESTful API using Rails.
Final Note
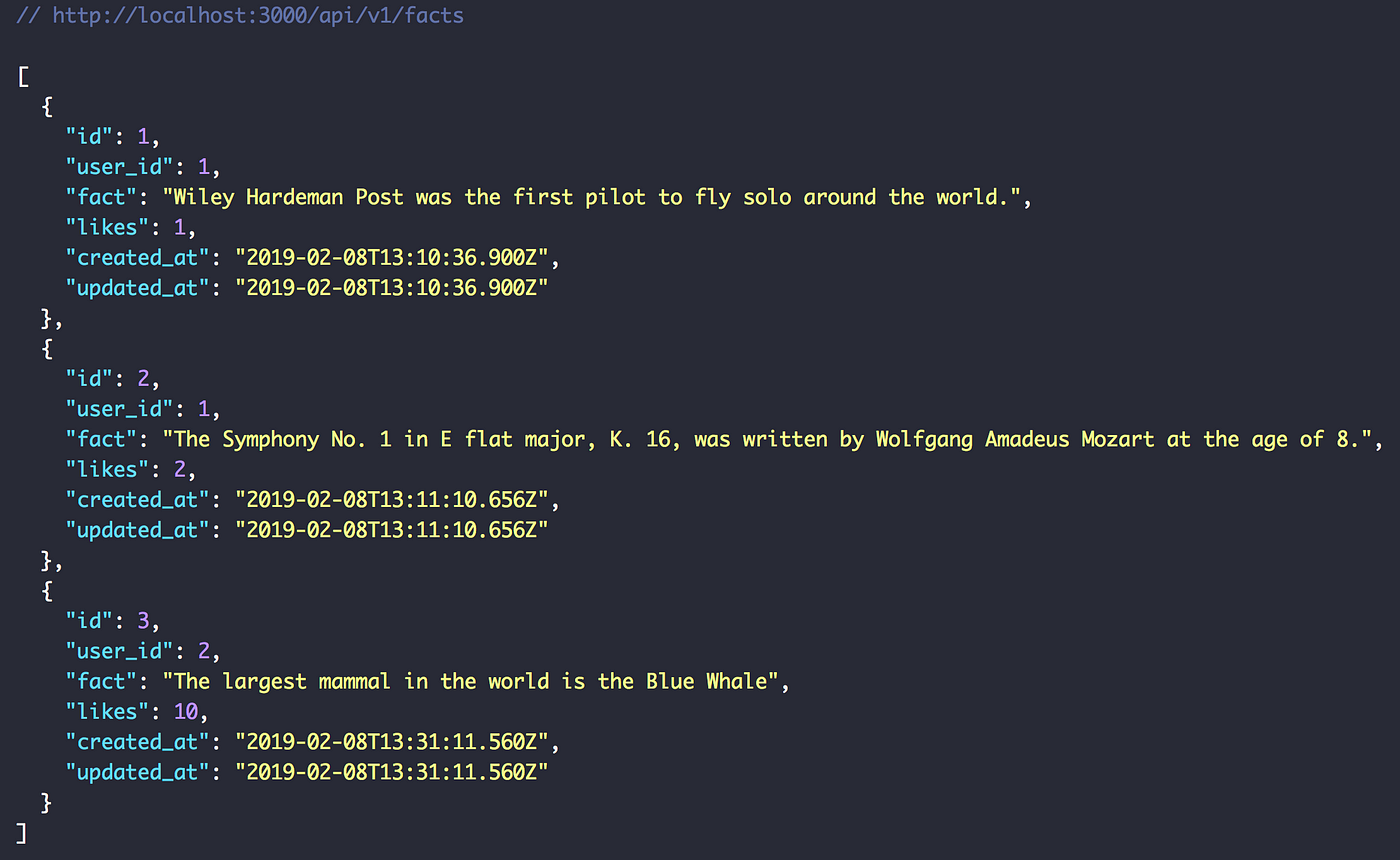
If you wanted your facts to be accessible all in one place, separate from the users that created them, in the routes file, instead of having Facts nested within Users, you could have it as a separate entity like so:

Then instead of this path: http://localhost:3000/api/v1/users/1/facts you could have http://localhost:3000/api/v1/facts which would no longer be user specific:
How To Add A Restful Api To Your Rails App
Source: https://medium.com/@oliver.seq/creating-a-rest-api-with-rails-2a07f548e5dc
Posted by: banksyessist.blogspot.com

0 Response to "How To Add A Restful Api To Your Rails App"
Post a Comment